
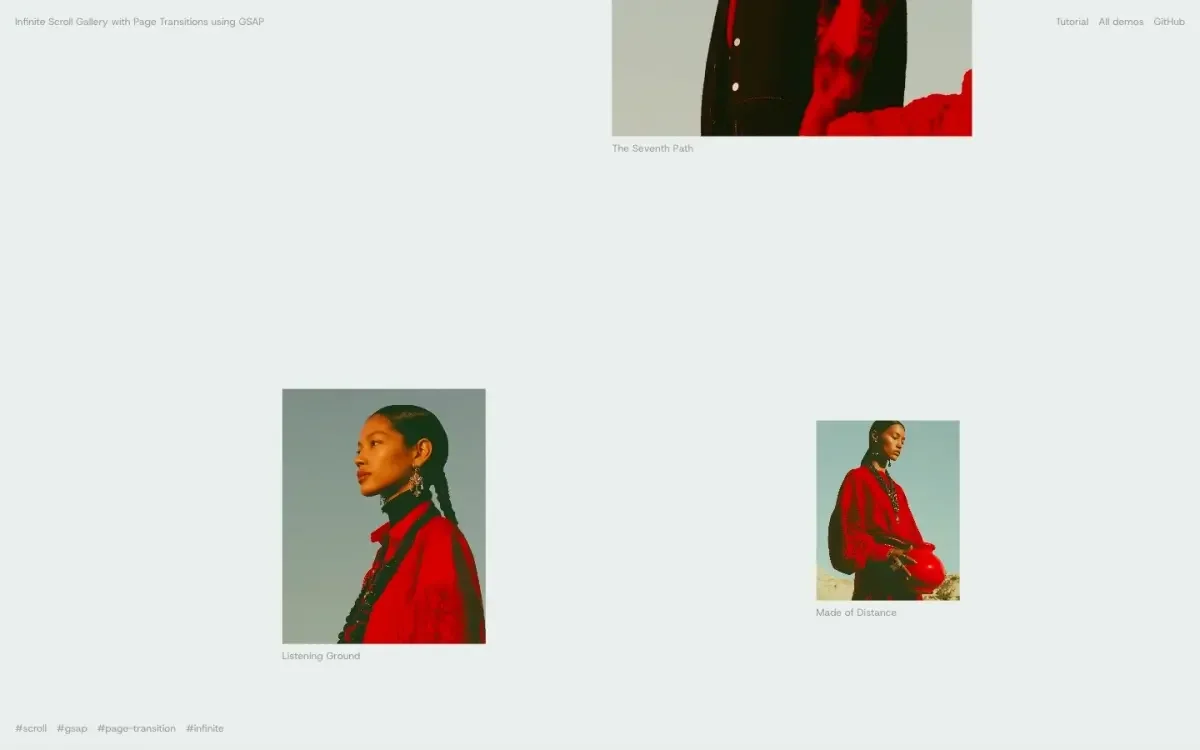
Various gallery styles have become staples across different websites, catering to portfolios and agency showcases alike. In this in-depth tutorial, I’m going to guide you through creating an infinite scrolling gallery where each image possesses distinct motion speed, contributing to a buoyant floating appearance. When an image is clicked, it transitions smoothly from its grid position into a focused detail view.
The structure of this tutorial includes three main sections:
- Slider (Scroller): An infinite scroll function based on both mouse wheel and touch interactions, featuring parallax effects for each item.
- Reveal: This section implements fading for items entering the viewer’s perspective, ensuring a smooth appearance without abrupt snapping.
- Transition: A morphing effect that expands a clicked item to showcase detailed content.
Throughout this process, I’ll exclusively use GSAP and standard JavaScript. The tutorial employs Observer for input handling, GSAP Flip for transition morphs, and SplitText for reveal animations.

1. Templating the Gallery
HTML Structure
First, let’s construct the HTML for the gallery:
<div class="gallery">
  <figure class="gallery__slide">
    <div class="gallery__img-wrapper">
      <img class="gallery__img" src="..." alt="Cliffs descending into a vibrant blue cove" />
    </div>
    <figcaption>Above the Cove</figcaption>
  </figure>
  <!-- Additional slides here -->
</div>
Next, the detail view will be contained in a separate overlay that remains hidden until a gallery item is clicked:
<div class="content">
  <div class="content-wrapper">

    <figure class="content__preview-img"><img alt="" /></figure>

    <div class="content__group-list">
      <button class="content__back" type="button">Back (Esc)</button>

      <div class="content__group" data-index="0">
        <div class="content__title">Above the Cove</div>
        <div class="content__description">...</div>
      </div>

      <!-- One content group per slide -->
    </div>

  </div>
</div>
Each group corresponds with a gallery item using data-index. When an image in the gallery is clicked, that item's content group becomes the active display. Importantly, the transition doesn’t involve creating new markup; it merely swaps visibility between content groups along with updating the preview image source. The <figure class="content__preview-img"> serves as the destination for every transitioning thumbnail.
Styling Considerations
Now, let’s shift to CSS. Since we'll override the conventional scroll behavior, we need to disable the native scrolling and arrange the display of each item properly:
html, body {
  overflow: hidden;
  overscroll-behavior: none;
  touch-action: none;
}

.gallery {
  display: flex;
  flex-direction: column;
  align-items: center;
  gap: 12vh;
  padding-top: 14vh;
}

.gallery__slide {
  transform: translateX(var(--stagger, 0vw));
}

.gallery__slide:nth-child(1) { --stagger: -24vw; --img-w: 190px; }
.gallery__slide:nth-child(2) { --stagger:  14vw; --img-w: 260px; }
/* Include additional lines for each slide */

.gallery__img-wrapper {
  width: var(--img-w, 200px);
  aspect-ratio: 0.8;
  overflow: hidden;
}
Each gallery__slide is assigned two custom properties: --stagger, which offsets the item from the center, and --img-w, exclusively designated for width. This approach allows for easier maintenance, particularly when resizing the gallery, as we avoid overwriting JavaScript transform values.
2. Developing the Slider
As mentioned earlier, this component maintains the scrolling position, prompting the other modules to react accordingly.
Implementing Infinite Scroll
A key strategy is to forego the browser’s default scrolling to manage the gallery's movement. Instead, I create a paused timeline where each slide completes a full circuit, using its timeline playhead to simulate scroll position.
In the accompanying code, we have verticalLoop, a helper function that establishes this timeline. Inspired by the GSAP’s seamlessLoop helper, it's adapted for vertical scrolling.
This function generates two tweens for each item: one for exiting the top of the screen and another for re-entering from the bottom of the gallery.
// Two tweens per item: one exits at the top, the other re-enters from below
for (let i = 0; i < length; i++) {
  const item = items[i];

  // Current offset in px
  const currentY = (yPercents[i] / 100) * heights[i];

  // Distance to the container's top edge
  const distanceToStart = item.offsetTop + currentY - startY;

  // Distance until item is fully off-screen at the top
  const distanceToLoop =
    distanceToStart + heights[i] * gsap.getProperty(item, "scaleY");

  // Slide upward until fully off-screen
  tl.to(
    item,
    {
      yPercent: snap(((currentY - distanceToLoop) / heights[i]) * 100),
      duration: distanceToLoop / pixelsPerSecond,
    },
    0,
  ).fromTo(
    // Then re-enter from the underneath
    item,
    {
      yPercent: snap(
        ((currentY - distanceToLoop + totalHeight) / heights[i]) * 100,
      ),
    },
    {
      yPercent: yPercents[i],
      duration: (totalHeight - distanceToLoop) / pixelsPerSecond,
      immediateRender: false,
    },
    distanceToLoop / pixelsPerSecond,
  );
}
Using yPercent for animation positions helps ensure calculations remain relative to each item's own height, which is especially useful if items feature different dimensions. However, we deploy the y property for parallax effects.
We also apply immediateRender: false on the fromTo tween to prevent GSAP from setting an initial bottom value prematurely. This is crucial, as otherwise, items would jump unexpectedly to the base of the gallery on initial rendering.
For the timeline itself, the final line ensures that every tween renders during the initial phase:
// Pre-rendering all tweens to eliminate first-frame jumps
tl.progress(1, true).progress(0, true);
This process generates all tweens in advance, eliminating any that might initialize on the first actual frame of animation.
As for duration, it’s determined by the distance each item travels, ensuring a consistent speed, irrespective of varying heights:
// Constant travel rate: speed 1 = 100px per second
const pixelsPerSecond = (config.speed || 1) * 100;
This means duration: distanceToLoop / pixelsPerSecond. If it seems confusing, consider that our timeline is paused: true and is never played directly. Thus, this factor establishes a conversion rate: one second of playhead time corresponds to 100px of movement. GSAP uses seconds as its default temporal measurement for timelines.
In practical terms, we’re performing plain time = distance / speed calculations. If an item needs to traverse 400px, it’s assigned a duration of 4; for 800px, it’s 8. This uniformity means each slide advances at the same velocity, preventing differing-sized items from drifting apart as they progress. Across twelve slides, our gallery spans about 5,200px, resulting in a loop duration nearing 52 seconds—definitely much longer than any viewer would wait for.
So why choose 100 instead of another figure? This value ensures a one-to-one correlation with the scrolling wheel, a concept that we'll soon revisit in the slider’s scroll() method, where we divide scrolled pixels by that same 100. If you scroll 300px, the playhead shifts by 3, moving the gallery a distance of 300px.
Don't be mistaken; those two instances of 100 represent the same number across two separate files. The property config.speed may look like an adjustable parameter, but if you set speed: 2, the gallery functions at 200px per second. Meanwhile, the scroll() method still divides using the original 100, meaning a 300px scroll would yield a 600px gallery move. Thus, you’d effectively amplify sensitivity without escalating speed.
Achieving Endless Scrolling
The timeline can loop, but the playhead may extend beyond 0 and the maximum duration. To accommodate this, we use gsap.utils.wrap to constrain any out-of-range values:
/** Create a continuous vertical loop for the gallery slides */
createLoop() {
  const gallery = document.querySelector(".gallery");

  // The gap between slides serves as the loop's bottom padding
  const gap = parseFloat(getComputedStyle(gallery).rowGap);

  // A paused timeline for a complete circuit; its playhead functions as our scroll position
  this.loop = verticalLoop(".gallery__slide", {
    repeat: -1,
    paused: true,
    paddingBottom: gap,
  });

  // Wrapping playhead values ensures seamless endless scrolling
  this.wrap = gsap.utils.wrap(0, this.loop.duration());
}
For instance, this.wrap(-3) on a 52-second loop brings back 49. This way, the playhead value can fluctuate significantly, whether positive or negative, without ever compromising its function within the timeline.
Regarding the bottom padding paddingBottom: gap, we pass it the rowGap so that it interprets 12vh from the CSS. However, within the helper function, we calculate totalHeight using offsetTop, which is measured from the document and not the gallery box. As a result, the gallery’s own padding-top: 14vh is inadvertently included in the total height before the extra paddingBottom is added.
This creates additional space at the transition point, where the final slide leaves and the first slide re-enters—totaling 14vh + 12vh = 26vh. This effectively creates a more spacious transition than other segments of the gallery, which maintain only 12vh of separation, enhancing the user experience during the transition.
Implementing Scrub Proxy for Motion
The final component contributing to the gallery's tactile experience is animating a proxy object instead of directly manipulating the time from the scroll wheel. This approach provides smoother animations:
/** Establish an eased playhead to create a smooth scroll interaction */
createScrub() {
  // Proxy object representing the current scroll position
  this.playhead = { time: 0 };

  // Smoothly animates playhead toward the target scroll
  this.scrub = gsap.to(this.playhead, {
    time: 0,
    duration: 0.75,
    ease: "power3.out",
    paused: true,
    onUpdate: () => {
      this.loop.time(this.wrap(this.playhead.time));
      this.applyParallax();
    },
  });
}
This code allows us to embed inertia, manage interruptions, and maintain a single rendering callback without requiring manual lerp loops or async frame requests.
Triggering this system is surprisingly concise:
/** Update the scrub target based on user scroll input */
scroll({ deltaX, deltaY }) {
  if (!this.enabled()) return;

  // Determine whether the swipe is primarily horizontal or vertical
  const delta = Math.abs(deltaX) > Math.abs(deltaY) ? deltaX : deltaY;

  // Our slides translate 100px per second, so converting pixels to time
  this.scrub.vars.time += delta / 100;
  this.scrub.invalidate().restart();
}
A GSAP tween captures its initial values upon first render. The invalidate() method discards those values, allowing the tween to read the latest playhead.time as its start point. Subsequently, restart() replays the easing for the duration of 0.75 seconds, transitioning toward the newly targeted position. The result is a highly responsive system, where rapid scrolling can retarget an existing tween seamlessly, delivering precisely the momentum effect we strive for.
Regarding the calculation delta/100, since the gallery covers 100px per second, dividing the distance scrolled by 100 effectively translates it into playhead time, achieving synchronized movement as the gallery responds directly to user inputs.
Observer for Input Normalization
Utilizing Observer allows us to condense wheel, touch, and pointer events into a unified API:
/** Set up observer for wheel and touch inputs */
createObserver() {
  this.observer = Observer.create({
    target: window,
    type: "wheel,touch",
    preventDefault: true,
    onChange: (self) => {
      this.scroll(self);
    },
  });
}
The preventDefault: true setting keeps our CSS from being overwritten. The overflow: hidden directive prevents page scrolling; however, the browser still activates wheel and touch events along with their default behaviors—like refreshing, rubber banding, or back swiping. By canceling these events at this level, we ensure the gesture’s sole impact is on our scrubbing logic and nothing else.
Creating Seamless Parallax Effects
Every slide in the gallery receives its unique speed multiplier, cycled from a predetermined array:
/** Assign distinct travel speeds to each slide for added depth */
createParallax() {
  // Speed multipliers: > 1 indicates faster, < 1 denotes slower
  const speeds = [1.3, 0.8, 1.15, 0.7, 1.25, 0.85];

  this.parallax = gsap.utils.toArray(".gallery__slide").map((slide, i) => ({
    el: slide,
    factor: speeds[i % speeds.length] - 1,
    offset: 0,
    visible: false,
  }));

  // Implement the initial scatter for resting positions
  this.applyParallax();
}
Notably, I create the factor as speed - 1, meaning a 0 factor aligns movement precisely with the timeline. This ensures offsets remain minimal. The alternating pattern of faster and slower slides ensures nearby slides don’t move in perfect unison. It’s worth mentioning: i % speeds.length allows for repeated motion patterns every six slides, so slides 1 and 7 would behave the same. That’s acceptable in this scenario since they are spaced about 2,500px apart, thus minimizing visibility overlap. However, for slides of smaller sizes or larger viewports, this could become more pronounced. To eliminate any repetition within one cycle, simply extend the array to match your total slide count.
The challenge lies in the need for a seamless transition that avoids visual jarring as slides move. By aligning the offset to zero at the defined wrap points, you prevent an obvious jump when a slide is repositioned. When implementing this, the code employs a strategy where each slide’s travel is determined by multiplying the progress by its factor. This ensures that as the items traverse from the top of the screen to the bottom, the adjustments made are not perceptible to the user at the critical moment of wrapping.
/** Implement parallax effect with visibility checks */
applyParallax(immediate = false) {
  const visibilityChanges = [];

  this.parallax.forEach((item) => {
    const rect = item.el.getBoundingClientRect();
    const loopTop = rect.top - item.offset;

    // Calculate new offset; should be zero at the wrap point
    item.offset = item.factor * (loopTop + rect.height);
    gsap.set(item.el, { y: item.offset });

    const top = loopTop + item.offset;
    const isVisible = top < window.innerHeight && top + rect.height > 0;

    if (isVisible !== item.visible) {
      item.visible = isVisible;
      visibilityChanges.push({ el: item.el, visible: isVisible, top });
    }
  });

  if (visibilityChanges.length) this.onToggle?.(visibilityChanges, immediate);
}
Calculating loopTop + rect.height allows us to determine when each slide leaves the visible viewport. This value becomes critical as it hits zero precisely when the slide exits the top of the screen, ensuring that the adjustment synchronizes flawlessly at the wrap juncture.
The stability of this movement hinges on the quick subtraction of the previous frame’s item.offset from rect.top. By doing so, we revert to a clean state, maintaining a consistent looping behavior. If not carefully managed, the offsets could stack up and lead to an undesirable effect where slides drift off-screen within seconds.
On the visibility front, this technique takes advantage of the fact that we're measuring each rectangle during every frame. This means identifying which slides have come into or exited the viewport requires minimal resource overhead. The key assessment occurs at the adjusted top position, which reflects the slide's true location on-screen post-parallax adjustment.
Rather than executing actions at this stage, we simply report the visibility state through this.onToggle?.(visibilityChanges, immediate). It’s a clean interface, which provides a concise callback containing the visibility changes. This flexibility is useful; even if no additional components are linked, the slider maintains its functionality without any disruption.
3. Reveal Functionality
Revealing each slide as it enters the viewport is straightforward: initiate a fade-in effect when a slide becomes visible and effectively reset the state once it leaves. Since we are dealing with an infinite loop scenario, ensuring each slide resets correctly is vital; otherwise, animations would play inconsistently.
constructor() {
  // Track reveal targets for each slide
  this.items = new Map();

  gsap.utils.toArray(".gallery__slide").forEach((slide) => {
    const wrapper = slide.querySelector(".gallery__img-wrapper");

    // Break captions into distinct characters
    const chars = new SplitText(slide.querySelector("span"), {
      type: "chars",
    }).chars;

    // Set the initial state to make the image and caption invisible
    gsap.set(wrapper, { autoAlpha: 0 });
    gsap.set(chars, { autoAlpha: 0 });

    this.items.set(slide, { wrapper, chars });
  });
}
Using a Map to store each slide’s visibility not only simplifies lookups later but also decouples state management from the DOM nodes themselves.
The autoAlpha property served here combines opacity handling with visibility management, which is crucial in performance-sensitive environments. This shorthand allows the browser to skip rendering fully transparent elements, hence optimizing performance in cases where most of the gallery is hidden away by default.
Once a change in visibility occurs, orchestrating the reveal is where precision comes into play:
/** Manage visibility changes for slides */
toggle(changes, immediate = false) {
  changes
    .filter(change => change.visible)
    .sort((a, b) => a.top - b.top)
    .forEach((change, i) => this.show(change.el, i * 0.12, immediate));

  changes
    .filter(change => !change.visible)
    .forEach(change => this.hide(change.el));
}
By sorting the visible changes based on their top position before staggering any animations, the reveal maintains an orderly and intentional flow. This step is crucial; in an infinite loop, the DOM order doesn’t necessarily correlate to the visual order on-screen. Thus, cascading reveals downward creates a natural viewing experience, no matter how the user scrolls.
When it’s time to reveal individual elements, it’s a two-step process, with the image fading in first, followed by its caption:
/** Fade in the image first, then characters in sequence */
show(slide, delay, immediate = false) {
  const { wrapper, chars } = this.items.get(slide);

  // Prevent entrance animation if immediate flag is set
  if (immediate) {
    gsap.set([wrapper, ...chars], { autoAlpha: 1, overwrite: true });
    return;
  }

  gsap.to(wrapper, {
    autoAlpha: 1,
    duration: 1,
    ease: "power2.out",
    delay,
    overwrite: true,
  });

  gsap.to(chars, {
    autoAlpha: 1,
    duration: 0.4,
    ease: "none",
    stagger: 0.025,
    delay: delay + 0.2,
    overwrite: true,
  });
}
Fast scrolling can cause a visible overlap of fade animations, triggering flickering as competing tweens fight for the same target. The overwrite: true command is essential; it ensures that any previous animations are immediately stopped when a new animation begins, maintaining visual integrity.
Instantly hiding elements accomplishes a similar goal:
/** Reset state for seamless replay on the next cycle */
hide(slide) {
  const { wrapper, chars } = this.items.get(slide);

  gsap.set(wrapper, { autoAlpha: 0, overwrite: true });
  gsap.set(chars, { autoAlpha: 0, overwrite: true });
}
There’s no need for off-screen elements to perform an exit animation, as they can’t be seen. Instead, they require a swift reset to ensure a clean slate for their next appearance in the continuous loop.